


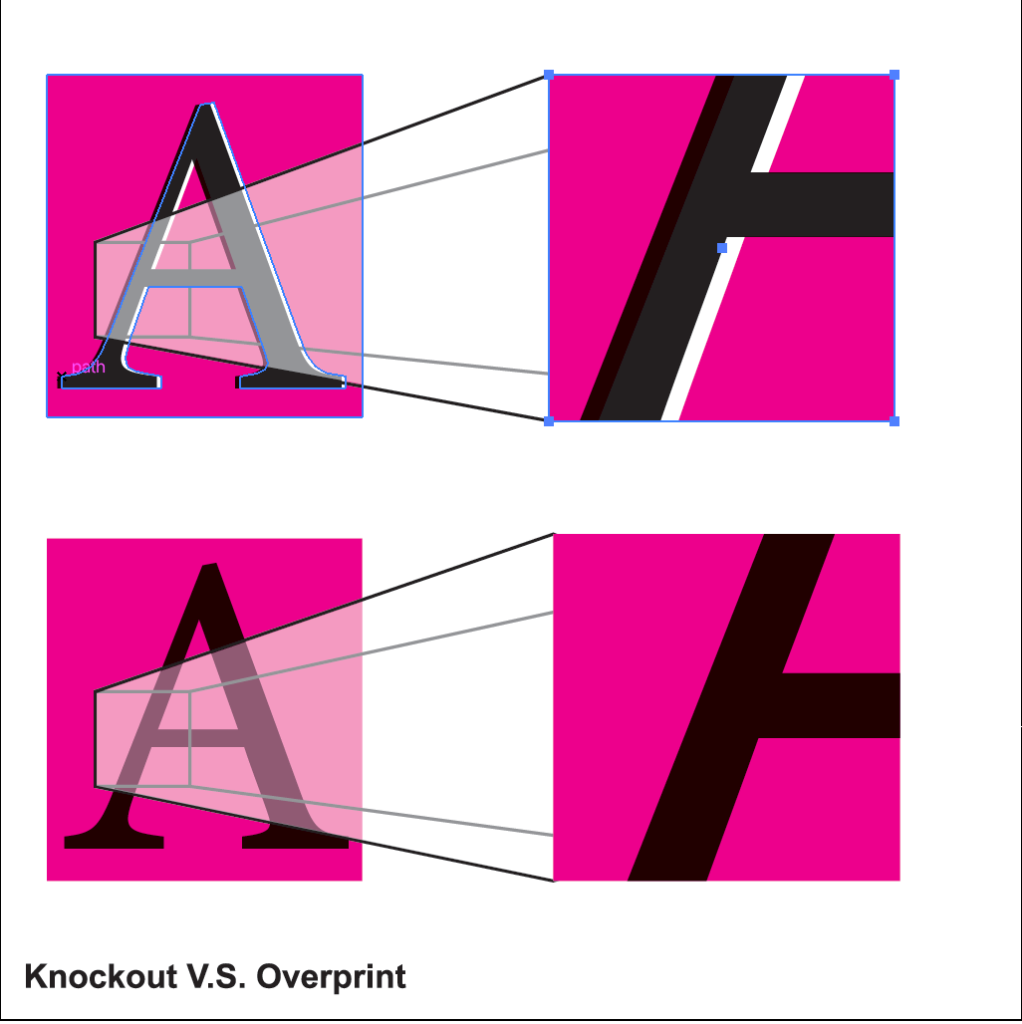
Knockout in printing is a technique where the graphic on top “knocks out” the background color, allowing a cleaner cut. However, it requires trapping, as misregistration is likely to occur during the printing process, causing certain elements to shift and creating white gaps in the design. It also can create an unintentional third color.
Overprint is quite the opposite of Knockout. Overprint is layering colors over one another, which can create third colors intentionally, allowing two inks to be used to create that color instead of three, lowering printing costs. Rich black comes into effect when overprinting. Overprinting eradicates the need for trapping and ensures there will be no misregistration.
Knockout
- Using the type tool, make an “A” with 100% black fill
- Using the rectangle tool, create a rectangle and fill it with 100% magenta and place it behind the “A”
- Convert the “A” into an outline (shift + command + o)
- Copy the “A”
- Select the layered “A” and the magenta box, and with the shape builder tool, hold option and click to knockout the center of the “A”
- Place the copied “A” over the knocked-out portion and offset slightly so that the background (white) is showing through, demonstrating misregistration
Overprint
- Using the type tool, make an “A” with 100% black fill
- Using the rectangle tool, create a rectangle and fill it with 100% magenta and place it behind the “A”
- Convert the “A” into an outline (shift + command + o)
After completing both exercises, select both 100% black filled “A”s and go to the Window menu. Select the Attributes panel and then click Overprint Fill. To preview, click Overprint Preview in the View menu. As you can see, the knocked-out “A” is a different shade of black where it overlaps with the magenta box.
Come back later for part 8, Knocking Out Small Text V.S. Overprinting Small Text!
Leave a Reply